
There’s something truly comforting about a warm, freshly made donut—especially when it comes straight from your own kitchen. This donuts recipe is simple, satisfying, and delivers that soft, golden perfection that makes every bite feel like a treat.
With a handful of pantry staples and easy-to-follow steps, you’ll create donuts that are perfect for breakfast, dessert, or sharing with someone you love. Whether you keep it classic with a glaze or get playful with toppings, these donuts are your canvas for creativity.
Let’s bring a little magic into your kitchen, one delicious donut at a time.
Table of Contents
Why You’ll Love This Donuts Recipe
Making donuts at home doesn’t have to be complicated. In fact, this recipe was crafted to make the process easy, enjoyable, and absolutely worth your time, whether you’re baking for the first time or just looking for a no-fuss, feel-good treat.
No Baking Degree Required
This recipe is beginner-friendly with clear instructions and simple techniques. No special tools or tricky techniques—just simple steps that work every time.
Uses Everyday Ingredients
You won’t need a long shopping list. Most of what you’ll use is likely sitting in your pantry right now:
All-purpose flour
Granulated sugar
Eggs, milk, unsalted butter
Baking powder or active dry yeast
A splash of vanilla for that classic bakery scent
Endlessly Customizable
Whether you’re into classic sugar-coated, rich chocolate glaze, or a jam-filled surprise, this recipe is your creative playground. Bake or fry—both versions come out beautifully!
Quick & Satisfying
Skip the long waits. If you choose the no-yeast route, these donuts come together in less than an hour—perfect when that craving hits.
Great for Any Moment
These donuts are a hit at brunches, birthdays, and cozy nights in. They also reheat well, so you can enjoy a warm, homemade treat anytime.
This recipe brings together comfort, convenience, and creativity—all in one delicious bite. Ready to dive in? Let’s gather what you’ll need.
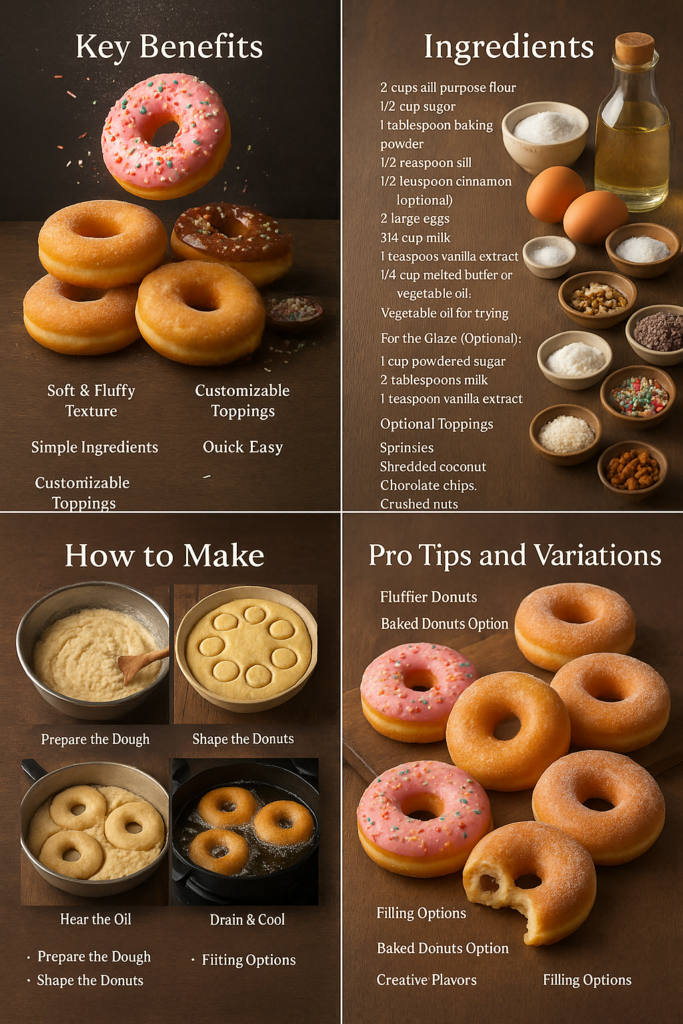
Ingredients for Homemade Donuts
Before we dive into the dough and glaze, let’s make sure you’ve got everything prepped and ready. This donuts recipe uses simple ingredients that strike the perfect balance of flavor, texture, and golden goodness. Nothing fancy here—just classic pantry staples that come together to create something unforgettable.
Here’s what you’ll need:
Dry Ingredients
2 cups all-purpose flour – forms the base of your donut dough
¼ cup granulated sugar – delivers a balanced touch of sweetness to every bite
2 tsp baking powder – helps give your donuts a light, fluffy rise
¼ tsp salt – balances the flavors and enhances sweetness
Wet Ingredients
¾ cup milk – whole milk is best, but any kind works
1 large egg – adds richness and structure
2 tbsp melted butter – for moisture and that buttery flavor
1 tsp pure vanilla extract – gives your donuts that nostalgic bakery aroma
Optional (but delightful) Add-Ins & Toppings
Cinnamon sugar – for a cozy, crunchy coating
Powdered sugar glaze – sweet and silky
Chocolate glaze or sprinkles – perfect for celebrations
Fruit preserves or cream filling – if you’re going for filled donuts
A Quick Tip Before You Begin:
Measure your flour using the spoon-and-level method to avoid packing it in—too much flour can make your donuts dense. Also, make sure your wet ingredients are at room temperature for a smoother, more cohesive dough.
With everything on hand, you’re just steps away from warm, golden donuts made right in your own kitchen. Let’s jump into the fun part—bringing it all together!
Step-by-Step: Bringing the Dough to Life and Frying to Perfection

Now that your ingredients are prepped and ready, it’s time to transform them into soft, golden donut dough and fry them to crispy, fluffy perfection.
1. Mix It with Care
Start by gently combining the wet ingredients with the dry ones.
Use a spatula or wooden spoon and mix just until everything comes together.
You’re aiming for a dough that’s soft and slightly tacky—but not overly sticky.
If needed, sprinkle in a bit more flour to adjust the texture.
Tip from the Kitchen: Stirring too much can lead to dense donuts. Mix just enough to bring the dough together, and you’ll be rewarded with light, pillowy results.
2. Shape with Ease
Dust a clean surface with a light coating of flour, then gently turn out the dough to begin shaping.
Press it out gently until it’s about ½ inch thick.
Grab your donut cutter—or improvise with two round cutters of different sizes—to form your donuts and donut holes.
Gather the scraps and repeat the process until you’ve used up all the dough.
Let the shaped donuts rest on a tray for 5–10 minutes while you prepare the oil.
3. Fry to Golden Goodness
Pour oil into a deep pot and heat it to 350°F (175°C).
Carefully lower 2–3 donuts into the hot oil at a time to avoid overcrowding.
Fry until golden brown, about 1–2 minutes per side, flipping once halfway through.
4. Cool and Coat
Once the donuts are perfectly golden and crisp, place them on a paper towel-lined plate to soak up any extra oil.
Let them cool slightly—this helps the glaze or cinnamon-sugar coating stick better without melting too much.
While the donuts are still warm, roll them in cinnamon sugar or dip them into your favorite glaze to lock in that delicious flavor.
Finishing Touches: Cool, Coat & Customize
You’ve fried your donuts to golden perfection—now comes the fun part: cooling, coating, and adding that final flourish. These last steps are just as important as the rest, turning good donuts into irresistible ones.
1. Drain and Cool
Right after frying, gently transfer the donuts onto a plate lined with paper towels. This helps absorb any excess oil and keeps them light rather than greasy.
Let them rest for a few minutes. You want them warm—but not piping hot—before adding any toppings. This ensures glazes and coatings stick beautifully without melting off or sliding around.
2. Add the Sweet Coating
Now it’s time to dress them up! Depending on your mood, you can go simple or make things extra special. Here are a few go-to finishes:
Cinnamon Sugar Coating:
While the donuts are still warm, lightly coat them with melted butter, then toss them in a blend of cinnamon and sugar for a sweet, flavorful finish.. The result? A comforting crunch with every bite.
Smooth Glaze:
Dip the top of each slightly cooled donut into your favorite glaze—vanilla, chocolate, maple, or even a citrus twist. Place them on a wire rack to set and let that glossy layer shine.
Classic Powdered Sugar:
Want something light? Using a fine mesh sieve, gently dust your donuts with powdered sugar to give them that classic, bakery-style touch.
3. Serve and Savor
Once the coatings have set, your donuts are ready to enjoy! Enjoy your donuts while they’re fresh to experience their peak flavor and soft, fluffy texture. They pair beautifully with a hot cup of coffee, tea, or even a glass of cold milk for a nostalgic treat.
Pro Tip: Store any leftovers in an airtight container at room temperature. Warm them for a few seconds in the microwave to revive that soft, fresh-from-the-fryer feel.
Whether you’re going classic or getting creative, these final steps let your personality shine through. So have fun with it—and don’t be afraid to try different flavors and toppings next time!
Serving Suggestions: Make Every Bite Memorable
Now that your homemade donuts are golden, sweet, and ready to eat, let’s talk about how to serve them for maximum enjoyment. Whether you’re hosting brunch or simply treating yourself, the right pairings and presentation can elevate the whole experience.
Perfect Pairings
Coffee & Donuts: A timeless duo. Pair your warm donuts with a freshly brewed cup of coffee—black, sweetened, or creamy, it all works.
Tea Time Treat: Match with a cozy chai or herbal tea for a comforting, less sweet complement.
Kid-Friendly Option: Serve with cold milk or hot chocolate for a nostalgic twist that never disappoints.
Creative Toppings & Sides
Add a side of fresh berries or fruit compote for a pop of color and a burst of freshness.
Offer small bowls of extra glaze, chocolate sauce, or caramel drizzle so everyone can customize their own donut experience.
Sprinkle chopped nuts, coconut flakes, or mini chocolate chips on top for extra texture and flavor.
Presentation Tips
Present your donuts on a cake stand or a rustic wooden board to give them that charming, café-inspired appeal.
Arrange different toppings in small dishes so guests can dip or sprinkle to their liking.
Add a dusting of powdered sugar right before serving for that picture-perfect, bakery-style touch.
When to Serve
Homemade donuts are best enjoyed fresh and warm, but they’re versatile enough to fit any occasion:
Morning brunches
Afternoon coffee breaks
Weekend family breakfasts
Dessert platters for gatherings
Pro Tip: If making ahead, warm them slightly in the microwave for 8–10 seconds before serving to bring back that soft, just-made texture.
With just a few thoughtful touches, your homemade donuts become more than just a treat—they become an experience worth sharing.
Wrapping It Up: Homemade Donuts, Made Simple
And there you have it—fluffy, golden, melt-in-your-mouth donuts that you made entirely from scratch. Isn’t it amazing what a few simple ingredients and a little love in the kitchen can create?
Whether you dipped them in glaze, rolled them in cinnamon sugar, or gave them your own creative twist, these easy homemade donuts prove that bakery-quality treats are totally achievable at home. They’re perfect for special occasions, weekend brunches, or just because—you don’t really need a reason to enjoy fresh donuts, do you?
Final Thought
Making donuts from scratch might seem intimidating at first, but with the right steps and a little confidence, it becomes an enjoyable, rewarding process. The best part? You get to share something homemade and delicious with the people you care about (or keep them all to yourself—we won’t judge!).
Thanks for baking along with me. Now go ahead, brew that coffee, grab a warm donut, and savor every bite. You earned it.
FAQs: Troubleshooting & Tips for Perfect Homemade Donuts
Whether it’s your first batch or your fiftieth, donut-making can stir up a few questions. Let’s smooth out the bumps so you can fry with confidence!
1. Can I prep the dough the night before?
Absolutely! Mix and knead your dough, then cover it tightly and let it chill in the fridge overnight. The next day, allow it to come to room temperature before shaping and frying. It’s a great way to make mornings easier, especially if you’re serving guests.
2. Which oil gives the best results for frying donuts?
Look for oils with a neutral flavor and high heat tolerance. Canola, vegetable, or sunflower oil are ideal. It’s best to skip olive oil—it’s more flavorful and not suited for high-heat frying.
3. How can I check if the oil is ready without a thermometer?
If you don’t have a kitchen thermometer handy, drop a tiny piece of dough into the oil. If the dough piece bubbles instantly and rises to the surface within seconds, your oil is likely in the perfect frying range—roughly 350°F to 365°F (175°C to 185°C).”
4. My donuts turned out greasy or uneven—what happened?
That’s often due to oil that’s too cold (causing them to soak up excess oil) or overcrowding the pan. Keep the oil consistently hot and fry in small batches so each donut cooks evenly.
5. Prefer to skip the frying? You can bake the donuts instead!
Just place them on a lined baking sheet and pop them into a preheated oven at 375°F (190°C). Bake for 10–12 minutes, or until they’re lightly golden and spring back when touched. While they won’t have that classic crispy edge, they’ll still turn out soft, fluffy, and totally delicious.
6. How should I store leftover donuts?
Once your donuts have cooled completely, transfer them to an airtight container. Keep them at room temperature, and they’ll stay fresh and soft for up to two days. For the best texture, avoid refrigeration—it tends to dry them out. A quick warm-up in the microwave can bring them back to life!
7. Can I air fry them instead?
Definitely! Air-fried donuts might not have the classic deep-fried crunch, but they offer a wonderfully light alternative that’s perfect for a guilt-free treat.. Give them a quick brush with oil and air fry at 350°F (175°C) for about 5–7 minutes, flipping once.
Still stuck? Got questions or need a little help? Leave a comment below—I’m here to make your donut-making journey as smooth as possible!
Donuts Recipe So Good It Feels Like Magic
Recipe Details
- Prep Time: 15 minutes
- Cook Time: 20 minutes
- Total Time: 35 minutes
- Servings: 12 donuts
- Calories per serving: 200 kcal (approx.)
Nutrition Information (per serving)
- Calories: 200 kcal
- Fat: 9g
- Saturated Fat: 5g
- Trans Fat: 0g
- Cholesterol: 30mg
- Sodium: 120mg
- Carbohydrates: 28g
- Fiber: 1g
- Sugars: 14g
- Protein: 2g
- Vitamin D: 0mcg
- Calcium: 20mg
- Iron: 1mg
- Potassium: 50mg
Categorize the Recipe
- Course: Breakfast, Dessert
- Cuisine: American
- Diet: Vegetarian, Can be made Vegan (with substitutions)
- Method: Baking, Frying
- Keyword: Homemade donuts, Magic donuts, Easy donut recipe, Sweet donuts
Skill Level: Beginner